


Warm, rich, and utterly sophisticated, chocolate-inspired nail designs have emerged as the season’s most coveted beauty trend. From deep cocoa hues to milk chocolate swirls, this indulgent aesthetic brings a touch of luxury to your fingertips whilst perfectly complementing autumn’s cosy atmosphere. Whether you’re drawn to glossy finishes reminiscent of melted ganache or prefer matte textures that evoke velvety truffles, there’s a chocolate manicure technique waiting to satisfy your style cravings.
The art of chocolate manicure
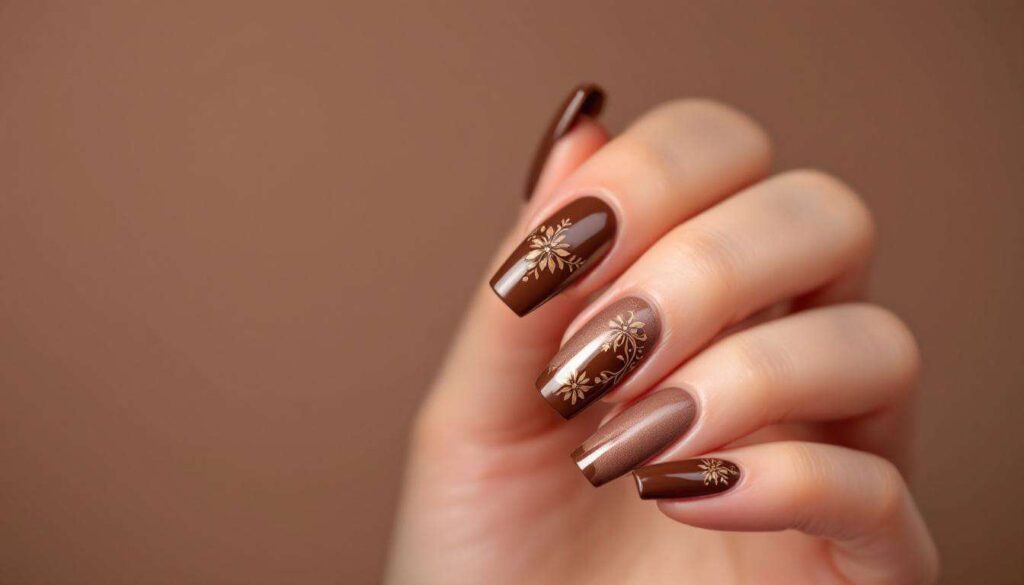
Understanding the chocolate aesthetic
The chocolate manicure transcends simple brown nail polish application. It encompasses a sophisticated palette of warm tones that mirror the various forms of chocolate we adore. This trend draws inspiration from confectionery artistry, translating the visual appeal of chocolate into wearable nail art. The beauty lies in its versatility, allowing for interpretations ranging from understated elegance to bold artistic statements.
Why chocolate tones suit everyone
Unlike trends that favour specific skin tones, chocolate manicures offer universal appeal. The spectrum of chocolate shades ensures compatibility across diverse complexions:
- Dark chocolate hues create striking contrast on lighter skin tones
- Milk chocolate shades provide warmth and richness to medium complexions
- Caramel and bronze variations complement deeper skin tones beautifully
- White chocolate accents offer subtle sophistication for any base tone
The psychology behind the trend
Chocolate manicures resonate because they evoke comfort and indulgence without appearing overly extravagant. The earthy, grounding nature of brown tones provides a refreshing alternative to traditional reds and pinks, whilst maintaining professional appropriateness. This psychological connection to warmth and pleasure makes chocolate-inspired nails particularly appealing during cooler months when we naturally gravitate towards cosy aesthetics.
Having established the foundational appeal of chocolate manicures, let’s explore the specific shades dominating this season’s beauty landscape.
The trendy shades for this autumn
Dark chocolate dominance
Deep, intense browns resembling 70% cocoa chocolate have claimed the spotlight. These sophisticated shades offer depth and drama whilst remaining surprisingly versatile. Dark chocolate polish works exceptionally well for evening occasions and provides an elegant alternative to black, softening the overall appearance whilst maintaining impact.
Milk chocolate warmth
Mid-tone browns with subtle warmth represent the most wearable option within the chocolate spectrum. These shades complement virtually any outfit and transition seamlessly from professional settings to casual gatherings. Milk chocolate tones particularly enhance gold jewellery and autumn wardrobes featuring camel, burgundy, and forest green.
The caramel spectrum
Lighter chocolate variations incorporating caramel and toffee undertones offer sun-kissed sophistication. These shades work beautifully for those hesitant to commit to darker tones, providing a gentle introduction to the chocolate manicure trend whilst delivering warmth and elegance.
| Shade category | Best for | Ideal finish |
|---|---|---|
| Dark chocolate | Evening wear, statement looks | Glossy or metallic |
| Milk chocolate | Everyday wear, professional settings | Satin or glossy |
| Caramel tones | Casual occasions, subtle elegance | Matte or cream |
Once you’ve selected your perfect chocolate shade, mastering the application techniques ensures professional-looking results.
Essential techniques for achieving a chocolate manicure
Classic single-colour application
The foundation of any chocolate manicure begins with proper preparation and application. Start with clean, shaped nails and a quality base coat to prevent staining. Apply chocolate polish in thin, even layers, allowing adequate drying time between coats. Two to three coats typically achieve optimal colour saturation, whilst a glossy top coat enhances longevity and shine.
Marble and swirl effects
Creating chocolate swirl patterns mimics the artistic appearance of marbled confections. This technique involves:
- Applying a base colour in lighter chocolate or nude tones
- Adding drops of darker chocolate polish whilst the base remains wet
- Using a fine brush or toothpick to create swirling patterns
- Sealing with top coat once completely dry
Ombré chocolate transitions
Gradient effects transitioning between chocolate shades create dimensional sophistication. Use a makeup sponge to blend different chocolate tones, starting with the darkest at the base and gradually lightening towards the tip. This technique requires patience but delivers stunning results reminiscent of chocolate gradients in gourmet desserts.
Chocolate drip designs
For those seeking artistic expression, drip effects replicate melted chocolate cascading down nails. Apply your base chocolate colour, then use a thin brush dipped in slightly lighter or darker polish to create controlled drips from the cuticle area. This playful technique adds personality whilst maintaining the chocolate theme.
With techniques mastered, the right accessories and finishes elevate your chocolate manicure from lovely to extraordinary.
Accessories and finishes to enhance the look
Metallic accents
Gold and copper foils complement chocolate tones exceptionally well, creating luxurious contrast without overwhelming the design. Apply metallic leaf fragments to accent nails or create delicate striping for refined elegance. Bronze glitter toppers also enhance chocolate bases, particularly for festive occasions.
Texture variations
Experimenting with different finishes transforms the chocolate manicure experience:
- Matte top coats provide velvety sophistication reminiscent of truffle coatings
- Glossy finishes create wet-look shine similar to melted ganache
- Sugar-effect powders deliver textured dimension mimicking chocolate bark
- Velvet flocking creates tactile interest for special occasions
Embellishment options
Subtle embellishments add personalised charm without detracting from the chocolate aesthetic. Consider tiny gold studs placed near the cuticle, delicate chain details across accent nails, or miniature pearl accents that echo white chocolate elements. The key lies in restraint, allowing the chocolate tones to remain the focal point.
Understanding how to integrate chocolate manicures into everyday life ensures this trend becomes a practical style choice rather than occasional indulgence.
How to incorporate chocolate manicure into your daily style
Professional environments
Chocolate manicures suit corporate settings beautifully when executed with subtlety. Opt for milk chocolate or caramel shades in satin finishes, keeping nails at moderate length with rounded or square shapes. Avoid excessive embellishments, focusing instead on immaculate application and healthy nail appearance.
Coordinating with wardrobes
Chocolate nails harmonise effortlessly with autumn and winter wardrobes. These shades particularly complement:
- Neutral palettes featuring beige, cream, and ivory
- Jewel tones including emerald, sapphire, and burgundy
- Earth tones such as rust, olive, and terracotta
- Classic combinations of black and white
Occasion-specific adaptations
Adjust your chocolate manicure intensity based on events. Casual gatherings suit matte finishes and lighter shades, whilst formal occasions warrant glossy dark chocolate with metallic accents. Weekend activities pair well with playful drip designs or marble effects that showcase personality.
Maintaining the beauty of your chocolate manicure requires specific care strategies that preserve both colour and condition.
Tips for maintaining your chocolate manicure over time
Protection strategies
Chocolate polishes, particularly darker shades, benefit from proactive protection. Wear gloves during household tasks, apply cuticle oil daily to prevent drying, and reapply top coat every two to three days to maintain shine and prevent chipping. These simple habits significantly extend manicure longevity.
Touch-up techniques
Minor chips need not spell disaster. Keep your chocolate polish accessible for quick repairs, applying thin layers to affected areas and blending carefully. For tip wear, apply polish horizontally across the nail edge before sealing with top coat, a technique that extends wearability between full applications.
Removal and nail health
Dark chocolate polishes require gentle removal to prevent staining. Use acetone-based remover with cotton pads, allowing the product to soak briefly before wiping. Follow removal with nourishing treatments containing vitamin E or jojoba oil to restore moisture and maintain nail strength between manicures.
| Maintenance task | Frequency | Expected benefit |
|---|---|---|
| Cuticle oil application | Daily | Prevents drying and extends wear |
| Top coat refresh | Every 2-3 days | Maintains shine and chip resistance |
| Complete manicure renewal | Every 7-10 days | Ensures fresh appearance |
Chocolate manicures represent more than fleeting fashion, offering timeless sophistication that flatters universally whilst providing creative flexibility. From selecting your ideal shade within the chocolate spectrum to mastering application techniques and maintenance routines, this trend delivers indulgent beauty with practical wearability. The versatility of chocolate tones ensures seamless integration into professional environments and personal style expressions alike. By embracing proper techniques and thoughtful embellishments, your chocolate manicure becomes a signature element of polished presentation throughout the season and beyond.