


Hanging a picture frame might seem straightforward, yet many homeowners find themselves staring at walls peppered with unnecessary holes from multiple attempts. The frustration of misaligned artwork, crooked frames, and damaged plaster has plagued decorators for generations. However, interior design professionals and experienced tradespeople have refined methods that eliminate guesswork and deliver precise results on the first attempt. These techniques combine careful planning, the right equipment, and systematic approaches that transform picture hanging from a nerve-wracking gamble into a predictable process. Whether you’re displaying a single cherished photograph or creating an elaborate gallery wall, mastering these proven strategies will save both your walls and your sanity.
Why avoid multiple holes in the wall
Structural and aesthetic consequences
Every unnecessary hole in your wall creates permanent damage that compromises both the structural integrity and visual appeal of your living space. Plasterboard and traditional plaster walls weaken progressively with each puncture, particularly when holes cluster in the same area. This deterioration becomes especially problematic in rental properties, where tenants face substantial deductions from security deposits for excessive wall damage.
The aesthetic impact extends beyond the immediate vicinity of your artwork. Failed hanging attempts leave visible marks that become glaringly obvious when you decide to rearrange or remove pictures. Even after filling and painting, these repaired areas often appear as slight discolourations or texture variations that catch light differently from the surrounding wall surface.
Financial implications
The costs associated with multiple hanging attempts accumulate rapidly:
- Filler compound and touch-up paint for repairs
- Replacement picture hooks and wall fixings
- Professional plastering services for extensive damage
- Potential redecorating of entire walls to achieve uniform appearance
- Reduced property value or rental deposit returns
These expenses become particularly significant when multiplied across numerous frames throughout your home. Understanding the proper techniques from the outset represents a sound investment that protects your property and finances whilst delivering professional-quality results.
Essential tools for perfect alignment
Measuring and marking instruments
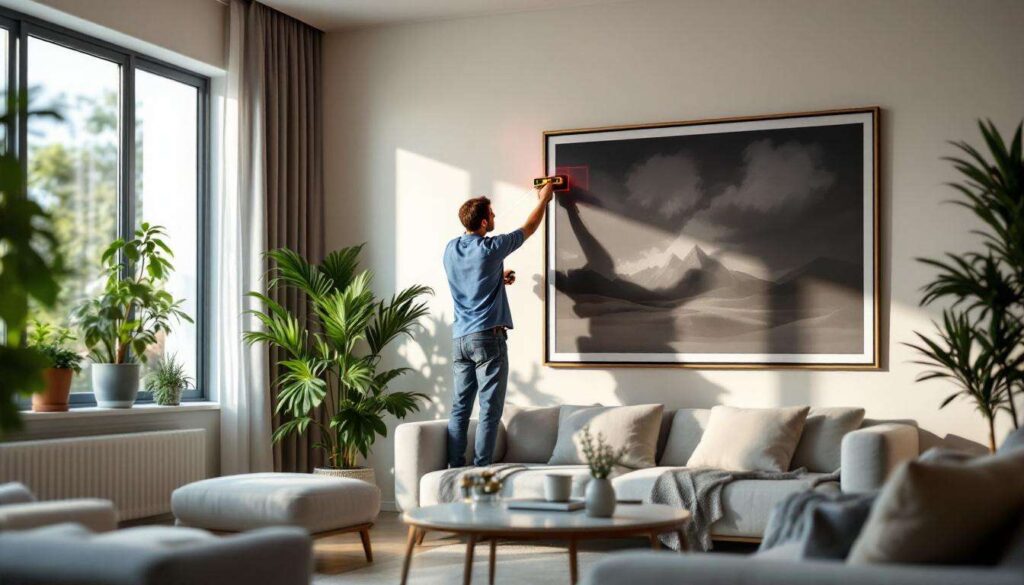
Accurate picture hanging begins with precision measurement tools that eliminate estimation errors. A quality spirit level remains indispensable, with laser levels offering enhanced accuracy for those tackling multiple frames or gallery walls. Digital levels with audible indicators prove especially useful when working alone, as they provide feedback without requiring constant visual checking.
A retractable steel measuring tape of at least three metres length ensures consistency across larger walls, whilst a sharp pencil allows for precise marking without permanent damage. Masking tape serves as an excellent temporary marking tool that won’t mar painted surfaces, and many professionals swear by removable adhesive strips for initial positioning trials.
Hanging hardware selection
| Wall Type | Recommended Fixing | Maximum Weight |
|---|---|---|
| Solid brick/concrete | Wall plugs with screws | Up to 50kg |
| Plasterboard | Cavity fixings/toggle bolts | Up to 20kg |
| Wooden studs | Wood screws directly into stud | Up to 40kg |
| Lightweight applications | Picture hooks/adhesive strips | Up to 5kg |
Selecting appropriate fixings for your specific wall construction and frame weight prevents failures that necessitate additional holes. A stud finder becomes essential when working with plasterboard walls, as securing frames directly to wooden studs provides superior holding power compared to cavity fixings.
Advanced positioning aids
Professional picture hangers increasingly rely on template systems that allow complete layout planning before making any wall penetrations. Brown paper templates cut to frame dimensions enable you to arrange and rearrange compositions until achieving perfect placement. Some specialists use projectors to cast frame outlines onto walls, providing visual confirmation of final positioning before committing to drilling.
With your toolkit assembled, the next critical phase involves preparing both your frame and wall surface to ensure optimal results.
Preparation: key step for flawless hanging
Frame assessment and hardware attachment
Before approaching the wall, examine your frame thoroughly to identify the optimal hanging points. Most frames feature D-rings or wire systems, each requiring different approaches. D-rings mounted one-third down from the frame’s top edge provide the most stable hanging position, whilst wire systems offer slight adjustability but can result in tilted frames if not properly tensioned.
Verify that all frame hardware sits securely fastened, as loose fixings will cause alignment problems regardless of wall preparation quality. For heavier frames exceeding 10 kilograms, consider reinforcing existing hardware or installing additional mounting points to distribute weight evenly.
Wall surface evaluation
Understanding your wall composition determines which techniques and fixings will deliver reliable results. Tap the wall surface gently whilst listening for hollow sounds that indicate plasterboard construction, or solid thuds suggesting brick or concrete. This simple acoustic test guides your hardware selection and helps locate wooden studs behind plasterboard.
Clean the intended hanging area with a dry cloth to remove dust and debris that might interfere with measurements or adhesive products. Check for hidden obstacles such as electrical cables or water pipes using a cable detector, particularly when drilling into walls near switches, sockets, or plumbing fixtures.
Calculating precise positioning
The foolproof positioning method begins with determining your frame’s centre point and desired height. Standard practice places picture centres at approximately 145-150 centimetres from the floor, aligning with average eye level. However, adjust this measurement based on ceiling height and furniture placement beneath the frame.
- Measure frame height and divide by two
- Measure distance from frame top to hanging hardware
- Subtract hardware distance from half the frame height
- Add this figure to your desired centre height
- Mark this calculated point on the wall
This mathematical approach eliminates guesswork and ensures your frame hangs exactly where intended. Having completed these preparatory steps, you’re ready to implement the proven alignment techniques that guarantee first-time success.
Proven techniques to align your frame
The paper template method
Creating a full-size template represents the most reliable technique for achieving perfect alignment without trial and error. Trace your frame’s outline onto brown paper or newspaper, marking the exact positions of hanging hardware. Affix this template to the wall using removable tape, adjusting position until achieving perfect placement. Use your spirit level to ensure the template sits completely horizontal before marking through the paper to indicate drilling points.
This method proves particularly valuable when hanging multiple frames in gallery arrangements, as you can position all templates simultaneously to visualise the complete composition. Once satisfied with the layout, mark through each template, remove the paper, and proceed with confident knowledge that every fixing point has been precisely determined.
The tape measure grid technique
For those preferring direct measurement approaches, establishing a reference grid delivers consistent results across multiple frames. Begin by marking a horizontal line at your chosen height using a spirit level and pencil. Measure and mark the horizontal centre point of your wall or designated hanging area.
From these reference lines, calculate the exact position where your frame’s hanging hardware will contact the wall. Double-check all measurements before marking the final drilling point, as this verification step catches calculation errors before they become permanent mistakes.
The laser level advantage
Laser levels project perfectly straight lines across walls, creating visible guides that simplify alignment dramatically. Position the laser to cast a horizontal line at your desired hanging height, then align your frame’s top edge or centre with this illuminated reference. Some advanced laser systems project both horizontal and vertical lines simultaneously, creating a cross-hair effect that pinpoints exact positioning.
This technology particularly benefits those hanging multiple frames at consistent heights, as the laser line remains visible whilst you work across the entire wall. The investment in a quality laser level pays dividends through time saved and frustration avoided, especially for homeowners who regularly update their wall displays.
Even with perfect techniques, certain common mistakes can undermine your efforts and necessitate corrective measures.
Errors to avoid at all costs
Measurement miscalculations
The most frequent mistake involves measuring from the wrong reference point on the frame. Many people measure from the frame’s top edge rather than from the hanging hardware position, resulting in pictures that hang lower than intended. Always account for the distance between your frame’s top and the actual point where it contacts the wall fixture.
Another common error occurs when measuring frame width, with people forgetting to halve this measurement to find the true centre point. This oversight causes frames to hang off-centre, creating visual imbalance that becomes increasingly obvious over time.
Inadequate hardware for frame weight
Underestimating frame weight leads to failed fixings that damage walls and potentially destroy artwork. Glass-fronted frames prove deceptively heavy, with large examples easily exceeding 15 kilograms. Always weigh your frame using bathroom scales before selecting wall fixings, and choose hardware rated for at least double the actual weight to provide a safety margin.
Using picture hooks designed for plasterboard on solid walls, or vice versa, represents another critical error. Each wall type requires specific fixing methods, and mismatched hardware either fails to grip properly or provides insufficient holding power.
Rushing the levelling process
Impatience during the levelling stage causes crooked frames that require repositioning. Many people make a single level check and assume accuracy, but professional installers verify alignment from multiple points across the frame’s width. Temperature changes and settling can cause frames to shift slightly after initial hanging, so checking level at both edges and the centre provides comprehensive verification.
Skipping the step of standing back to assess alignment from viewing distance represents another oversight. What appears level from close proximity may reveal subtle tilts when viewed from across the room, where most people actually experience the artwork.
Building upon these cautionary insights, professional installers employ additional refinements that elevate results from adequate to exceptional.
Professional tips for an impeccable finish
The viewing distance test
Before finalising any hanging position, step back to the typical viewing distance and assess how the frame relates to surrounding furniture, architectural features, and other wall elements. Professional designers consider sightlines from doorways and seating areas, ensuring artwork commands attention from the spaces where people naturally gather.
Photograph your wall with the template in position using a smartphone, as images often reveal balance issues that eyes overlook in person. This digital preview allows you to experiment with alternative positions without physical repositioning.
Grouping and spacing principles
When hanging multiple frames, maintain consistent spacing of 5-8 centimetres between pieces for cohesive gallery walls. Larger gaps create disconnection, whilst smaller spacing makes individual pieces compete for attention. Treat frame groupings as single unified compositions, aligning outer edges or centre points rather than attempting to align each frame independently.
- Arrange frames on the floor before wall installation
- Maintain consistent spacing throughout the arrangement
- Balance visual weight by distributing larger frames evenly
- Consider negative space as an active design element
- Use matching frame styles or coordinated colours for coherence
Fine-tuning adjustments
Small adhesive bumpers attached to frame backs’ lower corners prevent frames from tilting forward and allow micro-adjustments to achieve perfect level. These inexpensive accessories also protect walls from frame edge damage and create slight air circulation behind artwork, reducing moisture accumulation that can damage both frames and walls.
For frames that persistently hang crooked despite careful installation, check whether the hanging wire has stretched unevenly or if frame corners have warped. Sometimes replacing hanging wire or adjusting D-ring positions solves alignment problems that seem mysterious initially.
Professional installers also recommend photographing your final installation from multiple angles, creating a reference record for future adjustments or insurance purposes. These images prove invaluable when recreating arrangements after redecorating or when moving artwork to new locations.
Mastering picture hanging transforms a potentially frustrating task into a satisfying achievement that enhances your living space without damaging walls. The combination of proper tools, careful preparation, proven techniques, and attention to common pitfalls enables anyone to achieve professional-quality results on the first attempt. By investing time in measurement accuracy and employing methods like paper templates or laser levels, you eliminate the guesswork that leads to multiple holes and misaligned frames. The mathematical approach to positioning, coupled with appropriate hardware selection for your specific wall type, ensures secure installations that withstand time. Whether hanging a single treasured piece or curating an elaborate gallery wall, these strategies deliver the confidence and precision that protect both your artwork and your walls whilst creating displays that truly enhance your home’s aesthetic appeal.